 Playing the Relocated Settler
Opening
Playing the Relocated Settler
Opening
|
Quick Start Challenge Items below this point
Known Bugs and Glitches |
Again if you would like to try your own skills at this developing this start position you may download the exact map that was used for GOTM8 with all the civilizations and barbarians located in the same opening positions. Click here for the instructions to download the GOTM8 start positions replay scenario.
Carefully playing a game of “catch up”
We want to really look closely at the order in which we ask our worker to complete tasks because making use of every possible unit of gold, food, or shield production is critical to our success. If we can make strategic use of “pop rushing” to gain one extra unit or improvement in every 15 to 25 turns of play, that will help us regain a competitive position in the game. Here is a timeline of this sequence of events:
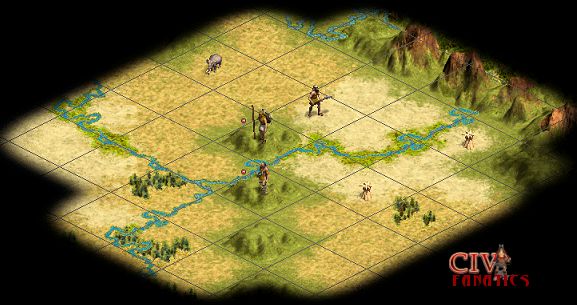
The orange text areas indicate where two happiness penalties exist at the same time. This double penalty can be balance on the monarch difficulty level by having one luxury connected and keeping at least one military police unit in the town as long as the population is held to less than four pop points. Note that the sequence of events includes a “false war” that begins somewhere around the year 1990 BC when the English attack our civilization. This is a false war because it occurs in the example because we have not used our settlers to found new towns and increase our power and territory. We should note that this is also a fairly stupid war, because the English attack us with five warriors who all get totally annihilated by our stronger defensive units located on hills or behind rivers. In the image below, you can see that our military units basically just get promoted to a more powerful level while the English military gets wiped out.
The timeline shown above includes a special technique known as “short rushing” that can be used to speed production while adjusting the timing of the completion event and making maximum use of existing production quantities. Short Rushing is a technique where you set the production queue to build a unit or improvement that has a production cost that is "short of" the total production amount you really wish to complete. Then you rush this shorter objective to completion and switch the full production balance over to apply to the higher objective. In this case, we waited until we had one shield in the production bin and then pop rushed the balance full to support completing a spearman. This rush converted one citizen into 19 shields and left our production bin totally full with 20 shields. We then switched the production queue over to build a settler which left the 20 shields in the production bin but left an additional 10 shields open to be filled by the production in subsequent turns. Timing this “short rush” event to coincide with a time when we would have a larger number of military police present would give us more flexibility to balance the unhappiness associated with pop rushing. The timing also lets us synchronize the unhappiness with a time period when our population is low while maximizing our effective growth rate that will let us recover the citizen’s worth of population in the fewest possible turns.
Summary
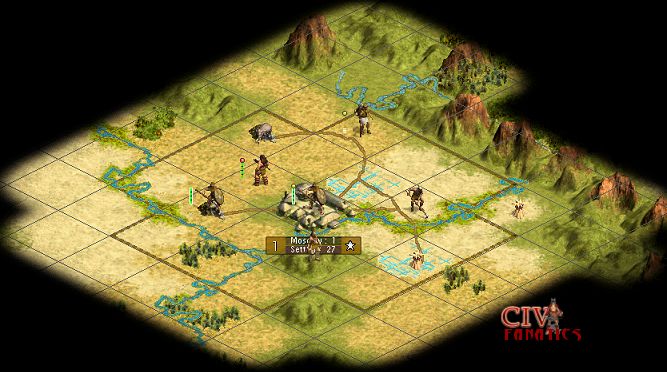
The image above shows the units in 1830 just after the last English warrior has been slaughtered. Note how one of our spearmen is fortified forward on a position to protect the mine and road on the plains square. This unit benefits from the added defense bonus of the river as well as being fortified and can still move back into our capital city and fortify to meet any threat that might appear. Moving the capital city onto the hill effectively opened up smooth movement access to all the squares surrounding that hill. With road mobility and staying north of the rivers, our units can move freely into any square of our territory all within a single turn. We still have a movement penalty duw to the river when we have to send our units to the south but our strategic position analysis of the world map tells us to expect contact with our rivals from either the west, north, or east map directions. Our total position in this relocated settler position scenario allows us to easily defend against an attack by five English warriors while still completing three settlers and fifty shields worth of military units approximately by the key comparison year of 2030BC. If we look to compare how we played this starting position to the other examples:
Relying too heavily upon "pop rushing" can cripple progress and even then it does not allow you to keep pace with more balance production approaches. If you automate your worker tasking and rely on the AI programming to make these critical decisions, your results will be severely reduced compared to almost any informed approach that uses your knowledge and decision skills. In most cases, we should not consider moving our initial settler, but if we apply our key tactical skills of assessing and improving the power terrain to maximize the productivity of our starting location we can decide whne the move might be a good idea while still allowing us to approach an optimum starting result.
Other related topics:
|
 -
-  -
- 

©
2002 by cracker@CivFanatics.com
All rights reserved. Please read the Terms
of Use.
Send mail to our webmaster with technical
questions about or potential problems with this web site.