 GOTM9 - The Climatic Battle for Kyoto
|
GOTM9 Index Items below this point
Known Bugs and Glitches |
In the big, picture this battle was just a slugfest without a great deal of tactical thought beyond some basic unit selection. All of the real strategy in this battle was involved in the moves to bring the units into position before the first stroke of the battle. The narrative of the battle on this page is accompanied by detailed combat event tables on a separate page. Combat tables are very interesting because they clearly illustrate some of the statistical outcome processes that are used to determine the success or failure of various unit attacks in the Civ3 system.
That
lucky archer bastard The attacking stack on the west side of Kyoto was defended by an elite swordsman, but this unit represented the weaker defender when compared to the elite spearman who stood behind a river as the strongest defender of the eastern stack. The archer attacked the elite swordsman and won an amazing sequence of five strokes without taking a single hit and then retreated back into the fortified town. After that freaky result I was determined to kill him and hang his skin from our flag pole.
Final
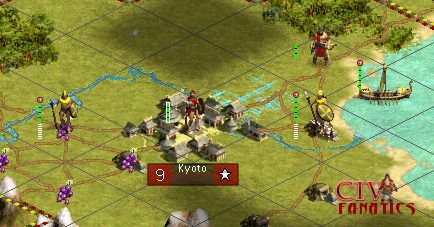
order of battle for the attack forces
In total, the attack force included 15 attack units against an anticipated defender force of 4 or 5 units plus catapults.
The
Army decision 1. I have not in the past observed armies that would retreat from combat rather than fight to the death and this problem concerned me in this example. I had factored the retreat ability into the combat plan. 2. The inability to upgrade units in an army would mean that these any units loaded into the army would be forever locked into their current combat ability. 3. When this battle was over and 4. The healing rate of the army would be lower than the healing rate of the same units individually and I needed the units to heal quickly so they could return to the battle as soon as possible after Kyoto was taken. 5. If I loaded three units into the army, I would be able to attack twice instead of three times and then the units would not be able to enter the captured city to help quell any resistors and avoid any counterattacks. This might leave the army exposed to being destroyed even after the battle was concluded as a win or a loss. If I only attacked once with the army to preserve its final movement ability, then I would have traded three attack moves for just one. 6. If I loaded elite units into the
army, then they could not produce any Great Leaders and we were desperate to
get one more Great Leader before 7. … and finally – Even with three
war chariots loaded into the army there would be still be a strong chance
that the army would be defeated. The spearmen defending All these factors combined to lead me to only plan to use the army as a reserve attacker to finish off one of the weakened defenders. In the big game picture, this was probably the correct decision but it did potentially result in a higher casualty count and some very tense moments in the battle.
Attacking
in waves
The best defender was now a regular spearman with all the other spearmen reduced to 2 hit point yellow status, so I selected the veteran swordsman from the coastal force to attack across the river and try to reduce or defeat the 3 hit point spearman. This swordsman bravely died after reducing the spearman to redline 1 in 3 status. The redlined spearman ducked down behind his yellow lined veteran buddy who now rose back to the defensive front. The risk at this point increased by a factor, because if a defender would win more than one defensive battle in the same turn then it would stand a very high chance of being promoted to the next experience level and gaining one hit point. It was possible to attack a defender in this “already one victory” condition and actually lose ground by having the defender end up stronger than it was at the start of that round of attack. The next three attacks by war chariots were very expensive because all three chariots lost the coin toss decision to fight to the death or retreat and only succeeded in redlining the defender spearmen. The fourth attacking chariot in this wave killed the archer who had now risen as the strongest defender and that indicated that the defending force had been severely weakened. Our attack force had seven (7) full strength attack units remaining to deal with the four (4) wounded or redlined spearman. Two more chariot attacks killed two of the spearmen before a third chariot retreated and gave a promotion to one of the final spearmen. We were left with four (4) full strength attackers plus full strength spearmen to reduce the final defenders. The lone chariot in the army attacked and destroyed its spearman opponent and also earned a promotion to elite status. Technically this chariot could still attack a second time, but this was not necessary and may have left the unit exposed after the other units advanced. The final attack chariot destroyed the last spearman and captured the city of Kyoto to much fanfare and massive fireworks.
Consolidating
and cleaning up the debris of battle In total, the attack on Kyoto had lost seven (7) attack units (including the swordsman that was defeated by the archer during the approach). The Japanese defenders lost four (4) spearmen, a total of three (3) archers, three (3) captured catapults and their capital city. Five of the attacking units that had been used in the battle were heavily wounded from combat and in total we could move all these units plus the undamaged defenders and reserves into the city for a garrison of fifteen units to quell resistance from the citizen population. The battle was costly but in the end we suffered fewer total casualties than our enemies even though we took more hit points of damage. To the west and south, our units that had captured Yokohama, Nara and Osaka had now begun to heal and could press forward with the mopping up campaign to finalize the extinction of the Japanese civilization.
Other related topics:
|
||||||||||||||||||||||
|
GOTM9 Index Items below this point
Known Bugs and Glitches |

 ©
2002 by cracker@CivFanatics.com
©
2002 by cracker@CivFanatics.com
All rights reserved. Please read the Terms
of Use.
Send mail to our webmaster with technical
questions about or potential problems with this web site.