 GOTM9 - The Battle before Edo
|
GOTM9 Index Items below this point
Known Bugs and Glitches |
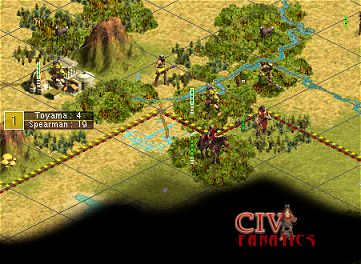
The pivotal battles of the Japan Campaign were fought in the forests and plains southeast of Toyama and just north of the Japanese city of Edo. We could not know exactly where Edo was located due to our lack of a complete territory map or world map of the Japanese territory but this lack of a precise city location only served to reinforce that tactics that were used to draw the Japanese forces into this battle outside of the fortified defenses of their cities. The
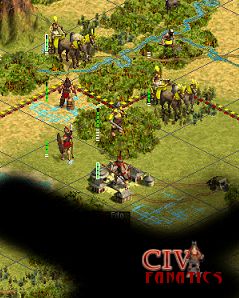
straw that brought Tokugawa to battle In retrospective, these slave workers served as additional bait that must have combined with any military necessity that Tokugawa may have felt in needing to counterattack our forces before they could reach his major city. At the end of 250AD, the units of the main advancing force were consolidating and healing near and in the captured towns of Nagoya and Toyama. Reconnaissance probes by war chariots allowed us to gain some extra visibility of the road network and terrain that lay in front of our troops to the south of Nagoya (click here to view the recon moves near Nagoya) and between Toyama and the final objective of Kyoto. Technically, both of these routes would be about the same distance in order to reach Kyoto but the key difference would lie in the type of terrain that we encountered as well as how well the Japanese may have already connected their road network.
I continued to push forward more war chariot units that had come up from the reserves at full strength and engaged in a few minor skirmishes that killed a Japanese warrior and a horseman without suffering any Egyptian casualties. The advancing units along with the tempting groups of workers combined with Tokugawa’s growing anger and frustration to lead him to make a fatal mistake.
Tokugawa’s counterattack
in 260 AD Even if our units failed to totally destroy the Japanese counterattack, our advance guard included stronger defensive units that could fortify and defend in the forest at a strength of 2.625 (2.00 * 1.25 * 1.25) versus the best Japanese attackers which could only muster an attack strength of 2.00. (click here to view a combat results table from this segment of the battle)
(click here to view a combat results table from this segment of the battle)
Tokugawa’s 2nd Major
counterattack in 280 AD
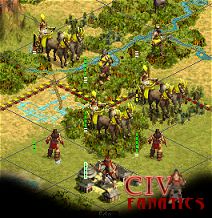
I counted the full strength Egyptian units and determined that we had five full strength attacking units that could probably capture Edo and we had five wounded units in the area as well. Our strong units might have been able to capture the town but that would have left us exposed in the next turn to the seven offensive Japanese units that we could currently see plus any further offensive units that might be advance from further back in the fog. At this point, the Egyptian units were still really hampered by continued problems with crossing the network of rivers that lie between our resupply point back in Toyama and our roads were still almost worthless. We were still three turns away from having the Engineering technology that would free our units up to move easily between these two positions. The lack of mobility combined with the large number of Japanese units in the counter attack meant that I felt the Egyptian forces had to deal with the counter attackers first and then use further reinforcements to consolidate and capture Edo in the next turn. From our central defensive position we could see Japanese units spread out in four locations all around us. Four of the seven Japanese units would be real offensive threats if we left them undestroyed while only one of the Japanese units (the single elite warrior to the southwest) could be classified as no real threat. In addition to the assessment of threat, we could see that the Japanese units were stacked in twos in three of the four locations immediately adjacent to our positions. These stacks of two were not as advantageous as if Tokugawa had placed all the units in a single stack, but each stack meant that we could attack and win one battle with a one movement unit like our swordsmen without having those units advance into an exposed position. This observation is very important because it meant that each of the three stacks of two Japanese units had to be attacked with a swordsman first in order top try and keep our units consolidated as much as possible. The last remaining Japanese unit in each stack could then be destroyed with War Chariots so that the victorious War Chariot could then consolidate back onto our defensive position. I we had used the units to attack in a different order, then we probably would have ended the turn with units spread out on three or four different locations instead of just the two strong defensive positions we actually ended with. (click here to view a combat results table from this segment of the battle)
At the end of 280 AD when Tokugawa moved his forces, more Japanese units rushed forward into the open areas to counterattack our forces. The significant change in this set of moves was that the Japanese units were now mostly defensive units instead of the offensive type units we had seen in previous turns. I interpreted this intelligence to mean that the current offensive power of the Japanese military might have been destroyed by the way we had dealt with the advancing combat up to this point. Our Egyptian forces had destroyed a total of eleven (11) Japanese horsemen and seven (7) Japanese archers with only three (3) Egyptian casualties because we had engaged most of these Japanese units in open terrain and by using the strength of our offensive units. A key point to observe in this process is the fact that, I tried to never have offensive units like horseman, archers, and war chariots just fortify and stand in a defensive position. I either used them to attack and then hide under stronger defensive units, or tried to stay out of reach of or run away from any potential attackers.
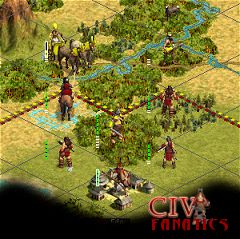
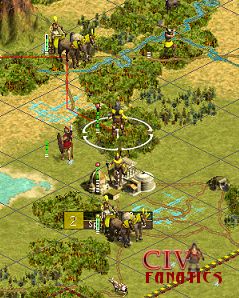
Our strong units on the defensive point, where we could attack directly into Edo, included five full strength war chariots (4 regular; 1 elite) plus two elite swordsmen that were slightly wounded but still viable attack units. We also had seven other units nearby that could defend the captures town and supplement the garrison. By observing the units come and go from Edo, I felt that the town was only defended by at least two spearmen (one veteran and probably one regular). Our seven strike units, mustering at total of at least 19 strokes, could easily handle two or three defenders with 7 to 10 hit points of defense. The first unit to attack Edo was our 4/5 elite swordsman who literally massacred the veteran spearman defender. This combat sequence should have been a closer exchange of blows with the swordsman at 3 strength attacking a fortified defender at 2.75 strength, but the sequence of strokes was totally won by the swordsman and then his victory produced the Great Leader “Ramses”. Our next attack used the elite war chariot to defeat the regular spearman that rose as the second defender. A slight surprise forced us to attack and defeat an archer to finally capture the town.
Capturing the key town Edo and gaining a great leader all in one turn, made this year 290 AD a truly memorable event in the history of our Egyptian civilization. To make things even more fantastic, Edo contained the additional prize of an intact barracks that would speed the healing rate for our forces and allow use to continue the forward advance into the Japanese capital of Kyoto at an even faster rate. The consolidating moves included advancing every possible wounded unit into the town in order to take advantage of the healing power of the barracks. I also used advancing horsemen to clear the supply route between Toyama and Edo of the stray Japanese warrior who was menacing our rear units. I bypassed the Japanese spearmen who had become trapped in our territory because they could easily be destroyed in the next turn with no additional risks, if they decided not to commit suicide by attacking our defensive positions. Either option would guarantee that they would die in the next few turns. In retrospect, I was in a bit too much of a hurry to use the great leader so that I could turn “Ramses” into an army and quickly get a victorious army all in one turn. I wanted to get the victorious army to enable our ability to build the Heroic Epic back home in one of our major cities. Completing the Heroic Epic would increase our chances of getting a second great leader before the war with Japan might come to an end. Strategically it was the right move to build an army immediately because that choice eliminated the hard coded programming block that prevents a second great leader from being produced whenever a first great leader already exists. My mistake was in loading a war chariot into the army to give it the victory chance. Since the war chariot had already partially moved it was not possible to advance that new army out of Edo and gain an immediate victory all in the same turn. Since I had to wait until the next turn to look for a target for the army, I could have waited one more turn and loaded the army with a horseman instead of the war chariot. The reason the war chariot in the army was a mistake, would not be immediately obvious, but later in the game when the army would be fully loaded with two knights in addition to the war chariot, I would come to find that the army was severely handicapped by the restrictions that prevent war chariots from moving onto mountains or through jungles without roads.
Notes on Great Leader production rate I do not know if the events are related, but the massive barbarian uprisings that occur worldwide had just been generated in the year 230 AD as a result of the second civilization entering the middle ages. For the Egyptians, this uprising included two swarms of eight horsemen each that were all defeated by a combination of defensive victories by three different units that earned promotions to elite status and then continued to win elite victory after elite victory just prior to the attack on Edo. Probably just a coincidence, but interesting to note.
Other related topics:
|
||
|
GOTM9 Index Items below this point
Known Bugs and Glitches |

 ©
2002 by cracker@CivFanatics.com
©
2002 by cracker@CivFanatics.com
All rights reserved. Please read the Terms
of Use.
Send mail to our webmaster with technical
questions about or potential problems with this web site.